
I was feeling restful and inspired when I woke up this morning, and considering that my haul from Chez Delaney came last night, I had the strong urge to try out all the glitters!
Now as you know, sometimes the glitter in polishes that we buy are not glittery enough. An alternative would be to buy your own glitter and do with it what you will. And this post is what I did with mine! Let me introduce:
 L-R: Octagon glitter in Purple that flashes baby blue, and Blue that flashes green.
 L-R: Rhombus (i.e. diamond-shaped) glitter in Green and Silver (kinda holo)
 L-R: Rhombus studs (not glitter) in Black and Silver
 L-R: Mixed silver glitter (3 sizes of glitter), and triangular emerald green rhinestones
I’d like to note here that all the above glitter were only 1 Euro each!
 Except for the polish that I bought – called Hefesto from the Speciallita collection “No Olimpo” (9.90 €), which is basically a range of holographic polishes. Hefesto is a holographic topcoat, and unlike ChG Fairy Dust that’s mainly glitter, the holographic particles in Hefesto are much smaller and goes on very smoothly.
It has a wide brush – much wider and thicker than OPI’s brushes – and doesn’t take much to have an even coat of holo awesomeness on your nails. Pity about the volume though – it’s only 6ml, less than half of a standard OPI bottle. But it’s okay, let’s see what this polish can do! I wanted to show the difference that Hefesto would make on standard colors, so I made a couple of gif images. The result is much finer than ChG Fairy Dust.

Clockwise from index to thumb: OPI Monsooner or Later; Zoya Creamy; OPI Not Like the Movies; Zoya Yasmeen; Essie Licorice

I think it looks best over black! I wanted to show you guys how Hefesto looks with different angles of light so above is my thumb in slow motion – I MUCH prefer this combination than even the original My Private Jet.
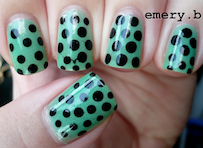
NEXT UP: A Summery Tribal(ish) Manicure!
 Now, I really like the studs – they’re a little raised from the center but flat enough to stick on your nails. And I like it against such a bright color – Zoya Layla is almost a neon color that dries semi-matte and is bright enough to notice from afar.
At first I wanted to use the black studs cos they were edgier, but as I applied the SV topcoat, the black BLED out and got dragged by the topcoat, revealing a purplish stud instead. I was beyond disappointed, but will try with other topcoats before I deport it to the trash. The silver studs work fine with topcoats though, luckily I bought it in 2 colors!
 This is without a topcoat – there are SO many designs you can do with these studs 😉
NEXT UP: Mermaid Scales Manicure
I was admiring the opalescent octagon glitters – they are so very pretty and large! According to the website, these are XL-sized ones and I rarely see glitters as big as this in regular polishes, probably because they’d be hard to pick up with a brush. I don’t have that problem since mine are in a ziplock bag! Hehehe
 Since they’re not very opaque glitters, I had to have a base color that complemented the blue. Above shows 2 coats of OPI Ski Teal We Drop under my table lamp.

I waited until the polish was semi-dry before I patted the glitter on with a finger. How do you know if it’s semi-dry? When you touch it, it leaves a fingerprint but you don’t get polish on your finger – that’s when it’s sticky enough to hold on to glitter and not wet enough to drag.
 I was admiring this manicure from an arm’s length and as my fingers moved, the large glitters shifted in colors and I almost died admiring it.
 Here you can see the green in the blue – pretty isn’t it? As my nail bed is curved, it was a little tricky to pat the glitter on smoothly so it didn’t leave any glitter corners jutting out. This batch of glitters was quite malleable though, so that wasn’t much of a problem.

NEXT UP: Glittery Pine Manicure
After such a blue manicure, I needed some green. They are my two favorite colors ❤

If it isn’t obvious enough in the picture, I tried to arrange the green rhombus glitter in a triangular design, and when I was done with my nails, it reminded me of a pine tree. So this is a glittery pine manicure.
 Polishes used – NYX Lux Green topped with with NYX Enchanted Forest
 Although I would have liked it, the green glitter isn’t prismatic – it shifts colors from light to dark green, as in the picture. It’s pretty though 🙂
NEXT UP: Glitterfest Manicure
I was SO excited when I saw that Chez Delaney had multi-sized glitter in a pack! It reminded me of OPI Servin’ Up Sparkle – a polish that was definitely not sparkly because the glitter wasn’t dense enough. Case in point:

“No, I will not use this polish.”

Amen to this. I don’t care if you can’t see the base color, all I want is glitter.

Surrounding my cuticles is not dirt, it’s the micro silver glitter I couldn’t really get off without wrecking the manicure. It’ll fall off eventually, or with some soap. The glitter’s in the background, on a piece of paper talking about how women who smoke during pregnancy may end up with antisocial children. You don’t say?
 As I was saying, the multi-glitter comes in 3 sizes – the XL octagon glitter, octagon medium sized glitter, and square micro glitter. It’s not superbly holographic although you can catch a glimpse of rainbow colors at certain angles. It’s mainly silver, but that’s okay.
 See my pinky? There’s the rainbow-ish angle. Because this glitter pack had different sizes (especially the micro glitter) it was difficult putting the remaining glitter back into the pack. I had glitter all over my fingers and even in my hair.
 The white I used in this manicure is Orly Au Champagne, but it’s nothing you should really care about, glitter takes center stage in this post!
NEXT UP: Shattered Glass Manicure
And lastly to round up my mega post, here’s my favorite look.

I really really like this one. It’s simple and sparkly. The silver rhombus glitter flashes different colors and it really IS like shattered glass.
 Base is my favorite nude (although Essie Not Just a Pretty Face is a huge contender), OPI Tickle My France-y. This look is chic and fun at the same time!
 I couldn’t pick up the glitter with my regular bead tweezers – they were too small and too thin, so I used my dotting tool, dipped it slightly in vaseline (which is clear but sticky) and then lightly tapped the glitter on piece by piece on the semi-dry polish. No dents or smudges, that’s how I like it.
Okay that’s all, I spent about 6 hours doing the looks and uploading and blogging and stuff 🙂 thanks for reading!


Pingback: Tickle My France-y: Revisited | emery.b
Wow I just came across your blog after searching nail blogs in Singapore and I must say I AM SO AMAZED. I love it! Your nails look great!! Great job!
Would love to see the whole collection of your nail polishes!!! 😀 Can u do a post on that?